Day 1: The Beginning of a Dream
Day 1: The Beginning of a Dream

Our tiny house journey kicks off on a brisk morning with the sun just peeking over the horizon. The excitement in the air is palpable as our team gathers around the foundation—a sturdy trailer that will carry our tiny home to its future destinations. The open field around us is soon to be filled with the sounds of hammers, saws, and cheerful chatter.
We start by laying out the base structure. The wooden beams, neatly arranged, are ready to be assembled. The team works in harmony, measuring and securing each piece with precision. The white van in the background serves as our mobile tool shed, packed with everything we need to turn these raw materials into a cozy living space.
As the day progresses, the trailer begins to transform. The floor is the first significant milestone, a testament to our dedication and teamwork. It's fascinating to see how quickly a simple idea on paper can start taking shape in the real world.
Building the Foundation
The second day of our tiny house build continues with the same enthusiasm and vigor. The images capture the essence of teamwork and progress as we move forward with constructing the foundation.
Setting Up the Frame
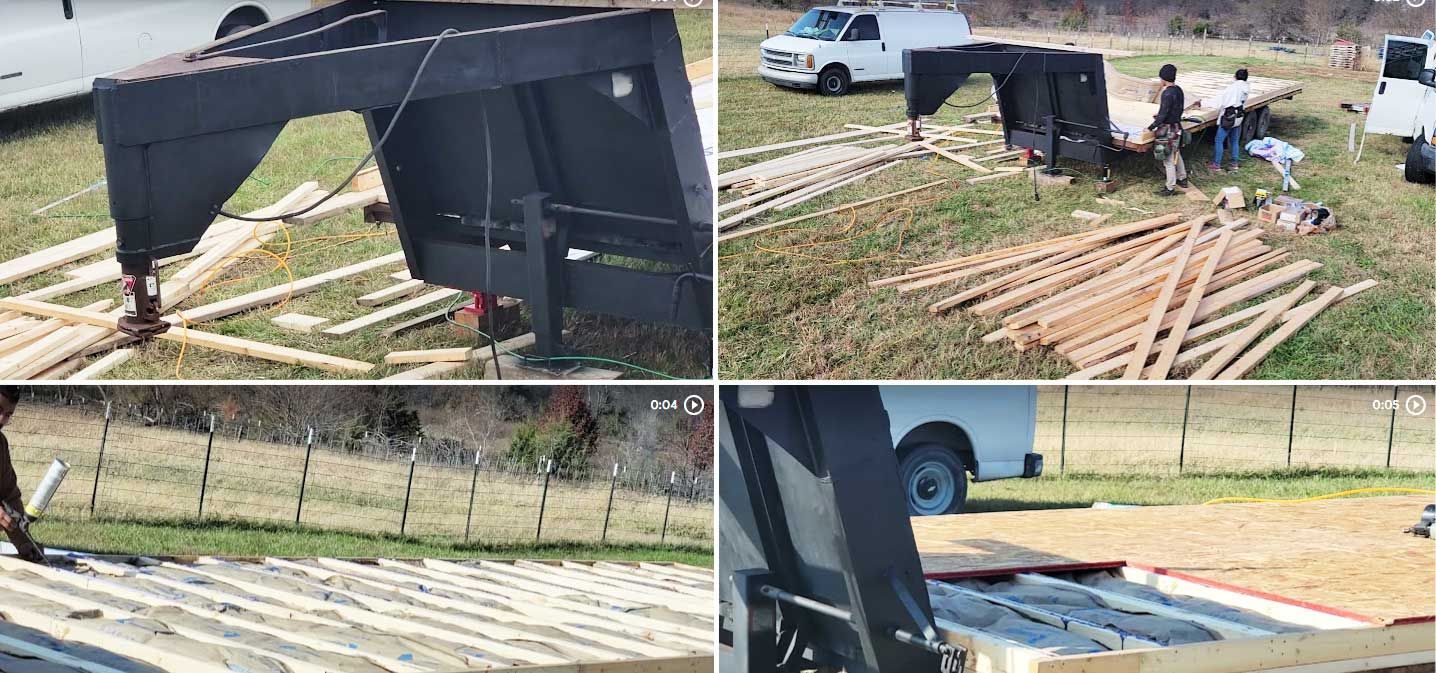
In the first image, we see our team working diligently to set up the wooden frame on the trailer. The previously laid-out beams are now coming together to form a solid base. The careful placement and alignment of each piece ensure that the foundation will be sturdy and reliable. The team works with precision, making sure every nail is driven correctly and every measurement is exact.
Insulating the Floor
The second image shows a crucial step in the process—insulating the floor. Here, the team is placing insulation materials between the floor joists. This step is vital for maintaining energy efficiency in the tiny house, ensuring it stays warm in the winter and cool in the summer. The dedication to detail is evident as the team meticulously installs the insulation, making sure there are no gaps or loose ends.
Securing the Base
Finally, in the third image, we see the progress of the flooring. The base is now secure, with the plywood sheets firmly attached to the frame. This strong and level surface is ready to support the walls and roof that will soon follow. The red outline hints at the future placement of walls, giving us a glimpse of the tiny house’s layout.
These early steps might seem mundane, but they are the foundation of a home that will be filled with warmth, laughter, and memories. Each nail hammered and board placed is a step closer to realizing our dream tiny house. Stay tuned as we continue to build and bring this vision to life!
Raising the Walls
With the foundation firmly in place, our third day of building sees the vertical transformation of our tiny house. The excitement grows as we begin to see the outline of our future living space.
Framing the Structure
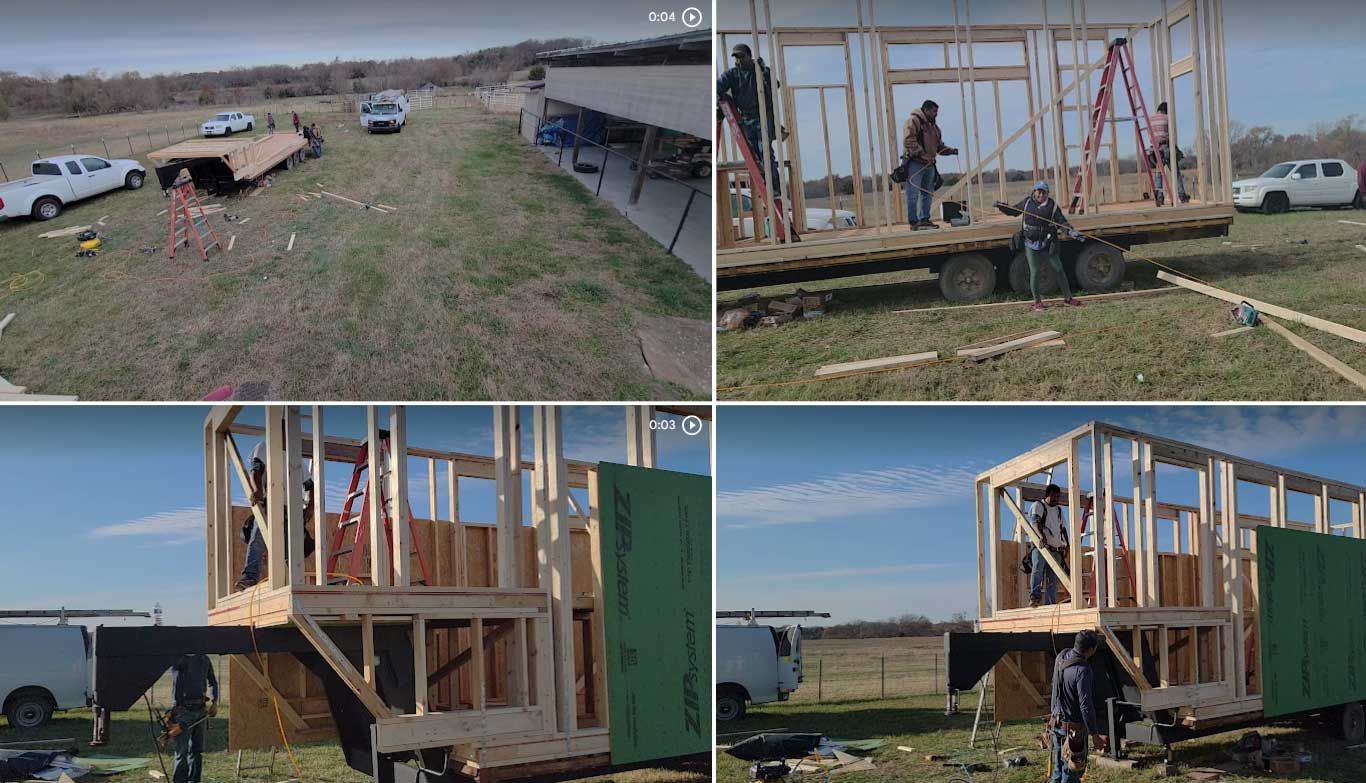
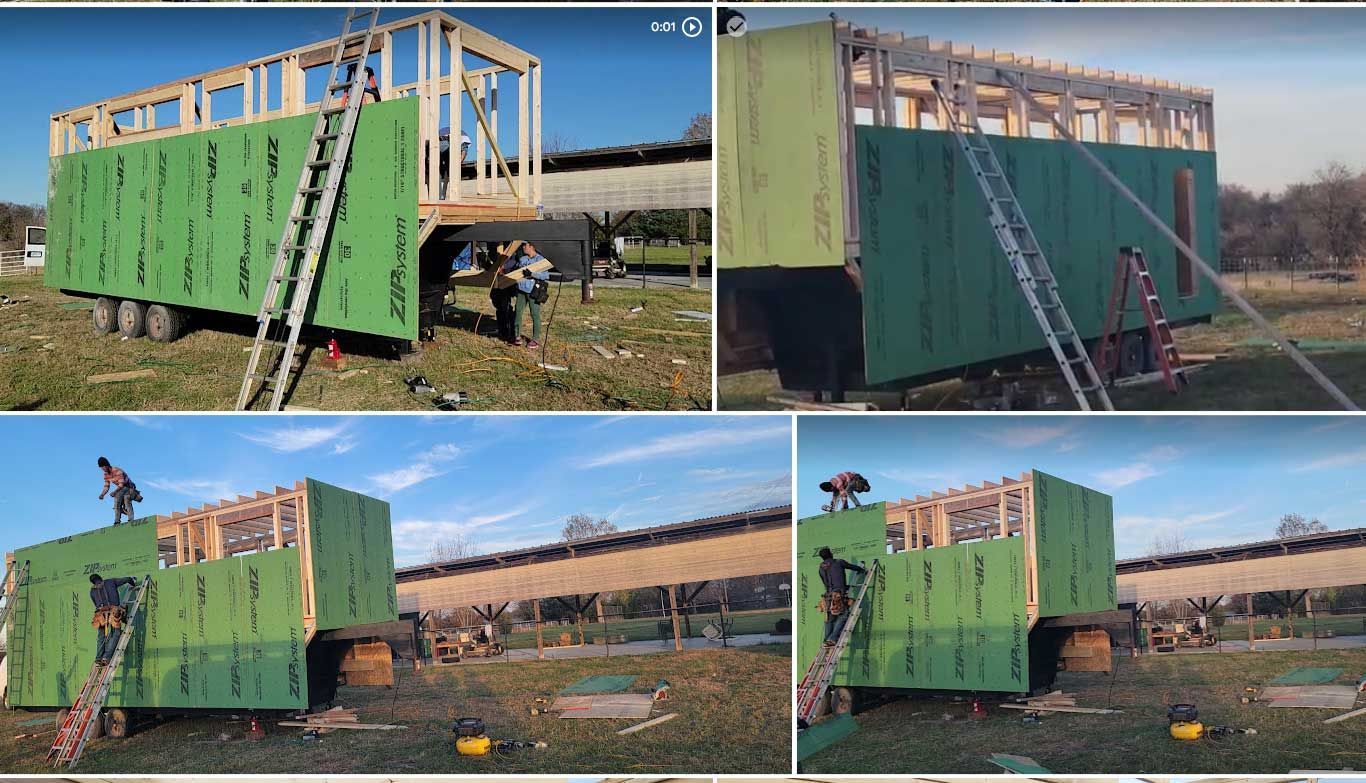
In the first image, our team is hard at work framing the walls. The wooden skeleton rises from the trailer, creating the first glimpse of rooms and spaces within the tiny house. The team, equipped with ladders and tools, works diligently to ensure each stud is perfectly aligned. This stage is critical, as it sets the stage for the house's overall structure and stability.
Adding Height
The second image shows significant progress as the walls gain height. The second story starts to take shape, adding a new dimension to our tiny house. The teamwork is evident as members work together to lift and secure each piece. The structure begins to resemble a home more with each passing hour, hinting at the cozy loft that will soon overlook the living area.
Securing the Exterior
In the final image, the first layers of exterior sheathing are being installed. These green panels not only add to the structural integrity but also provide a barrier against the elements. It's a pivotal moment, as the house starts to gain its form and protection. The sheathing signals the transition from a skeletal frame to a more enclosed and habitable space.
Our tiny house is no longer just a concept—it's becoming a reality. The walls standing tall against the backdrop of the open field symbolize our progress and determination. Each nail driven and board placed brings us closer to a completed home. Follow along as we continue this exciting journey, turning dreams into walls and walls into a home.
Enclosing the Dream
As our tiny house continues to rise, the fourth day focuses on enclosing the structure, providing the much-needed protection and shape that brings our vision closer to reality.
Sheathing the Walls
In the first image, the sheathing process is well underway. The green panels are being attached to the frame, forming the exterior walls. These ZIP System panels offer excellent protection against the elements, ensuring that our tiny house will be both weather-resistant and energy-efficient. The team carefully aligns and secures each panel, transforming the skeletal frame into a more defined structure.
Working at Heights
The second image captures the team working on the upper sections of the walls. With ladders and safety gear, they methodically cover every inch of the frame with the protective sheathing. It's a balancing act, requiring both skill and caution, as they navigate the heights to ensure the house is fully enclosed. The dedication of our builders is evident as they work tirelessly, driven by the shared goal of creating a beautiful and sturdy home.
Final Touches
In the third image, the final touches are being added to the sheathing process. The exterior walls are almost complete, offering a glimpse of the finished look. The structure now stands tall and robust, ready to face the elements. The sense of accomplishment is palpable, as the once bare trailer now resembles a proper house.
As the day draws to a close, we take a moment to appreciate how far we've come. From a simple trailer to a nearly enclosed tiny house, each step has been a testament to hard work and collaboration. The progress we've made fuels our excitement for the next stages—roofing, interior work, and finally, the finishing touches that will make this house a home.
Stay with us as we continue this incredible journey, building not just a tiny house but also a dream come true.
Interior Framework and Layout

As we move into the fifth day of our tiny house project, the focus shifts to the interior framework. With the exterior walls securely in place, it’s time to define the spaces that will make this tiny house a cozy home.
Creating the Loft
The first image shows the early stages of constructing the loft. This elevated space will serve as a sleeping area, maximizing the use of vertical space. The wooden beams are carefully measured and placed, creating a sturdy platform. This cozy nook will eventually be a place of rest and relaxation, with a window providing a stunning view of the surroundings.
Hallway and Dividers
In the second image, we see the hallway taking shape. This narrow passage will connect different areas of the tiny house, leading from the living space to the bathroom and loft. The framing for the walls and doorways begins to outline where each room will be. It's fascinating to see how every inch of space is meticulously planned to ensure functionality and comfort.
Staircase and Storage
The third and fourth images highlight the construction of the staircase leading to the loft. These stairs are not just a means of access but also a clever storage solution. Each step doubles as a storage compartment, making the most of the limited space. The framework for these stairs is robust, ensuring they are both safe and functional.
Room for Creativity
As we look at these developing interiors, it's clear that this tiny house is more than just a small living space; it's a testament to innovative design and efficient use of space. Every beam and board is placed with purpose, creating a home that is both practical and charming.
We’re excited to continue this journey, adding the finishing touches and transforming this framework into a warm, inviting home. Join us as we delve into the next stages of construction, from installing utilities to adding the final decorative elements. The adventure continues, and we can’t wait to share it with you!
Windows and Doors Installation
As we reach the sixth day of our tiny house build, the project takes a significant step towards completion with the installation of windows and doors. These elements are not just functional; they also add character and personality to our tiny home.
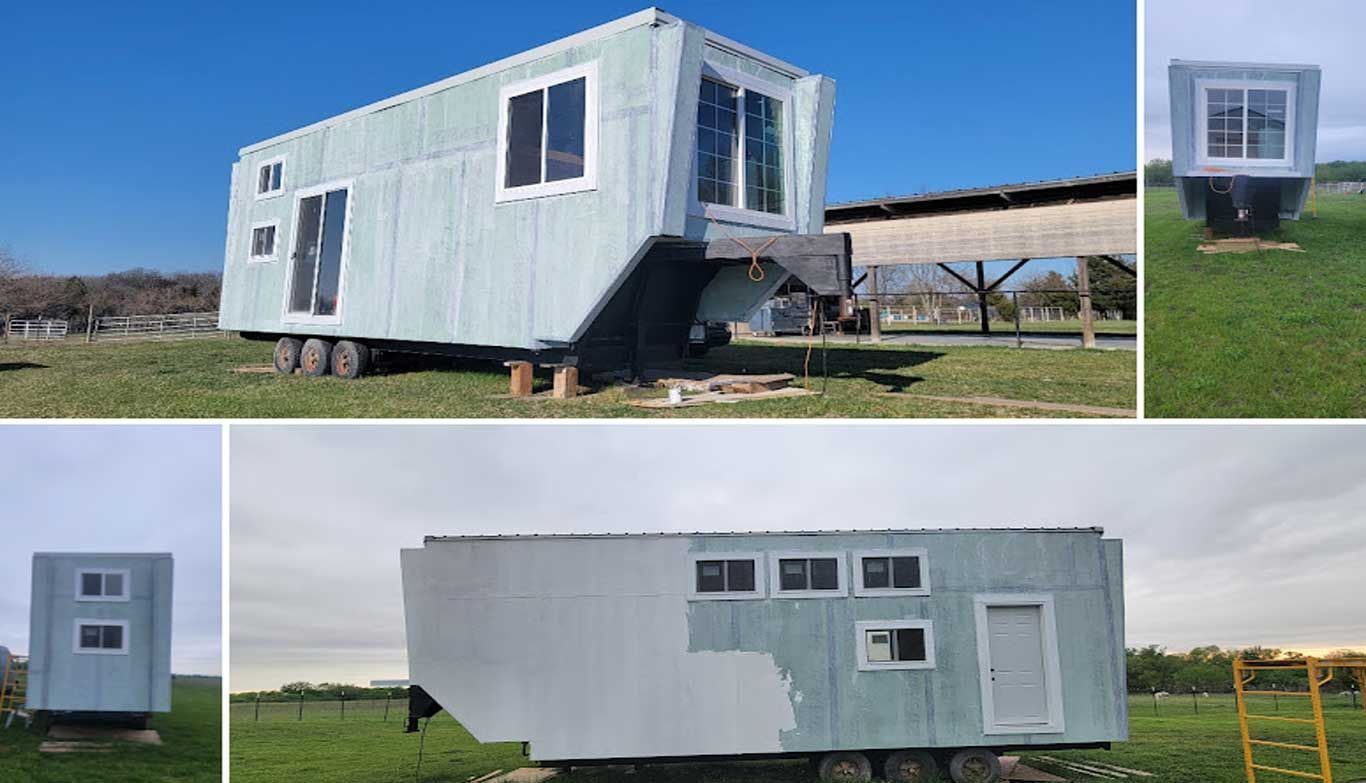
Front and Side Views
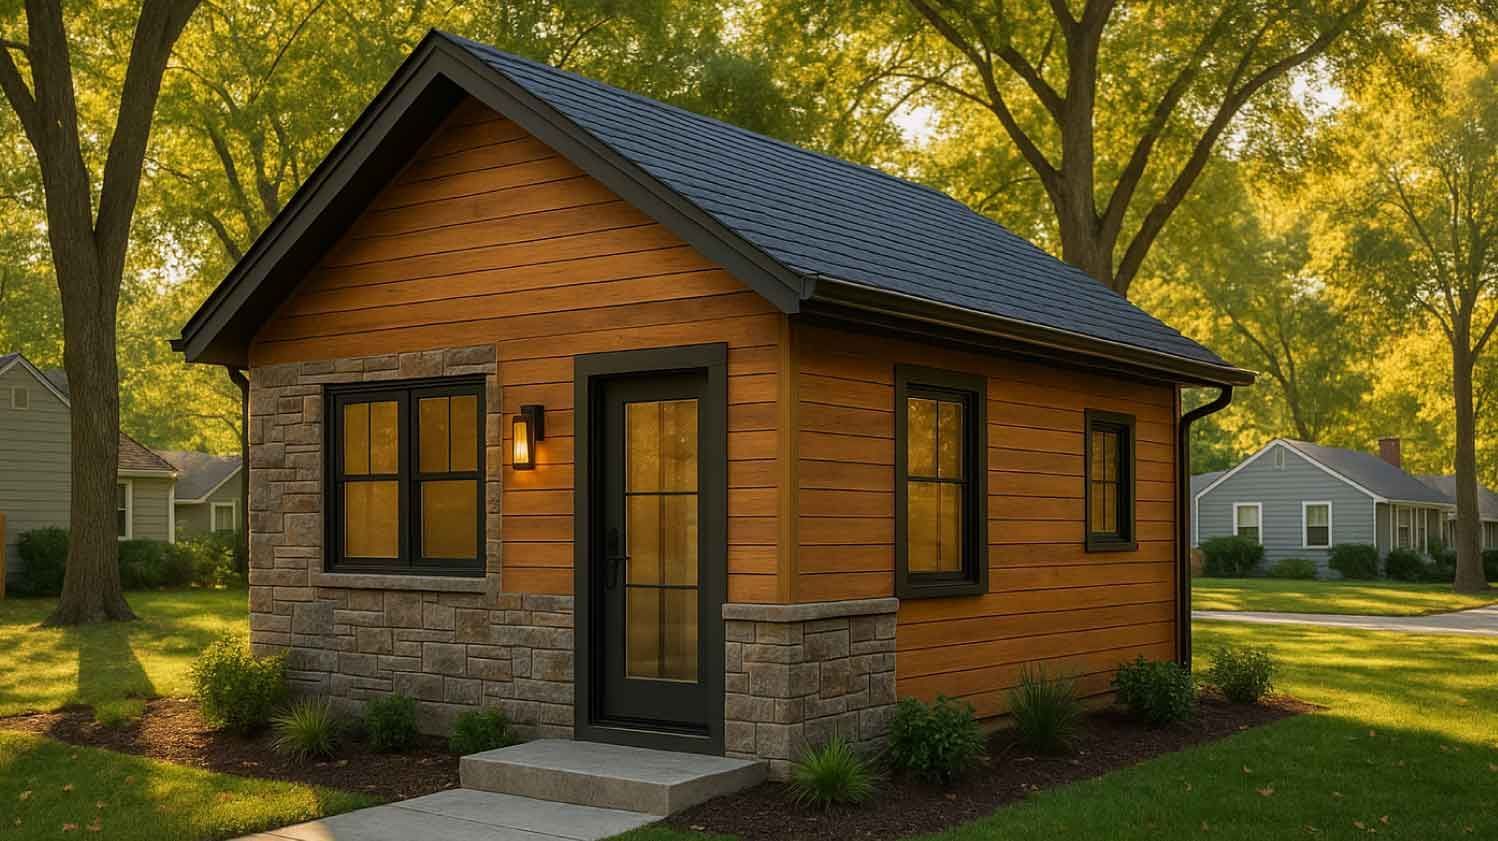
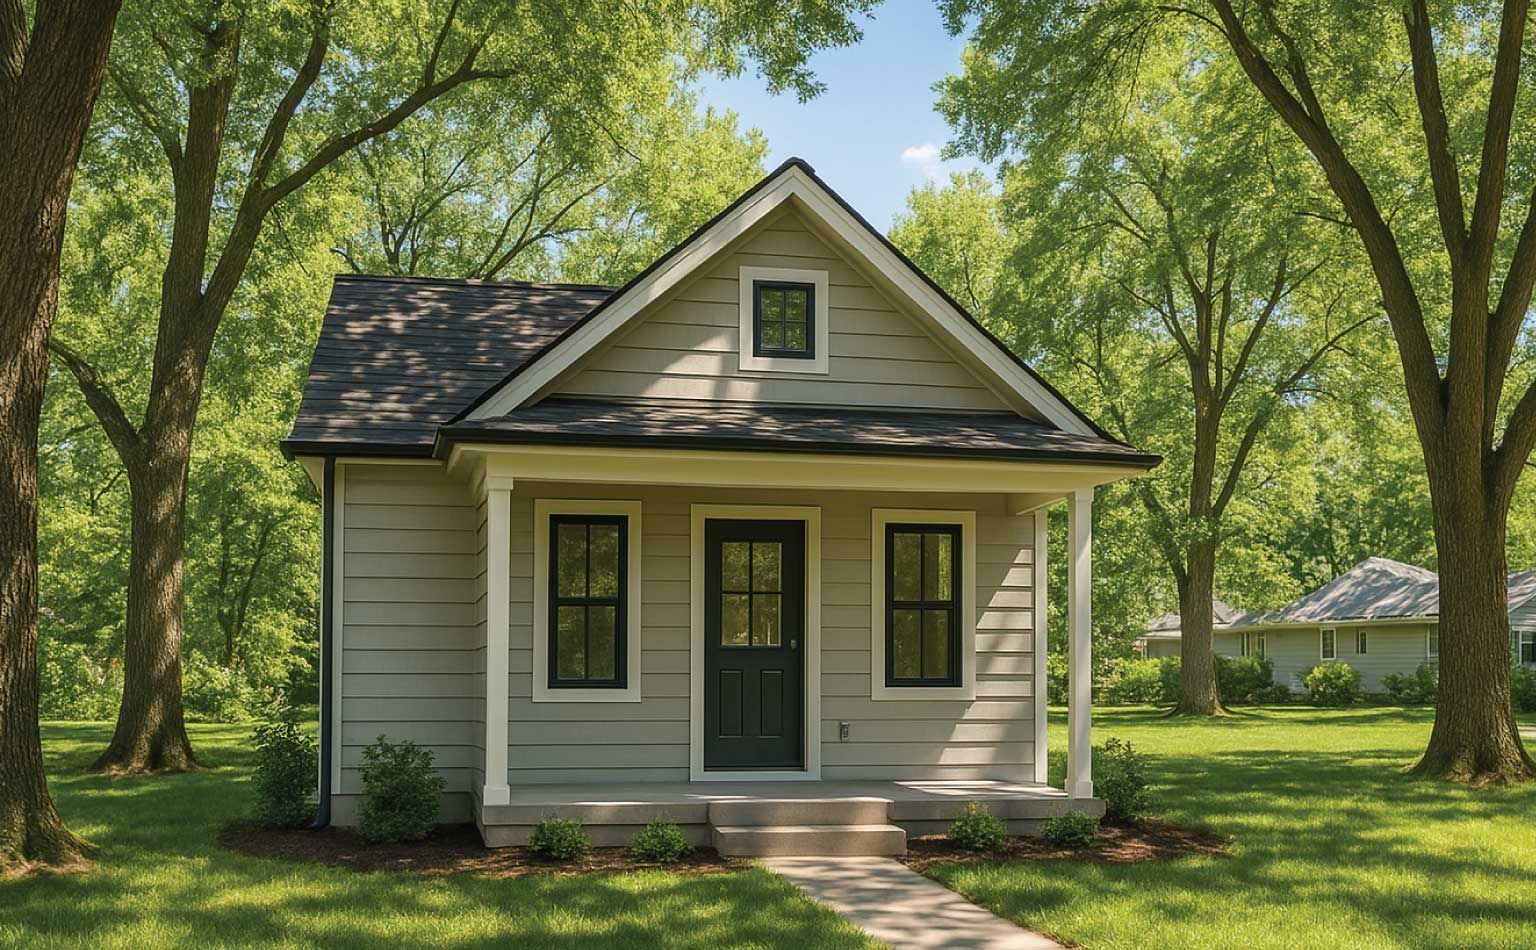
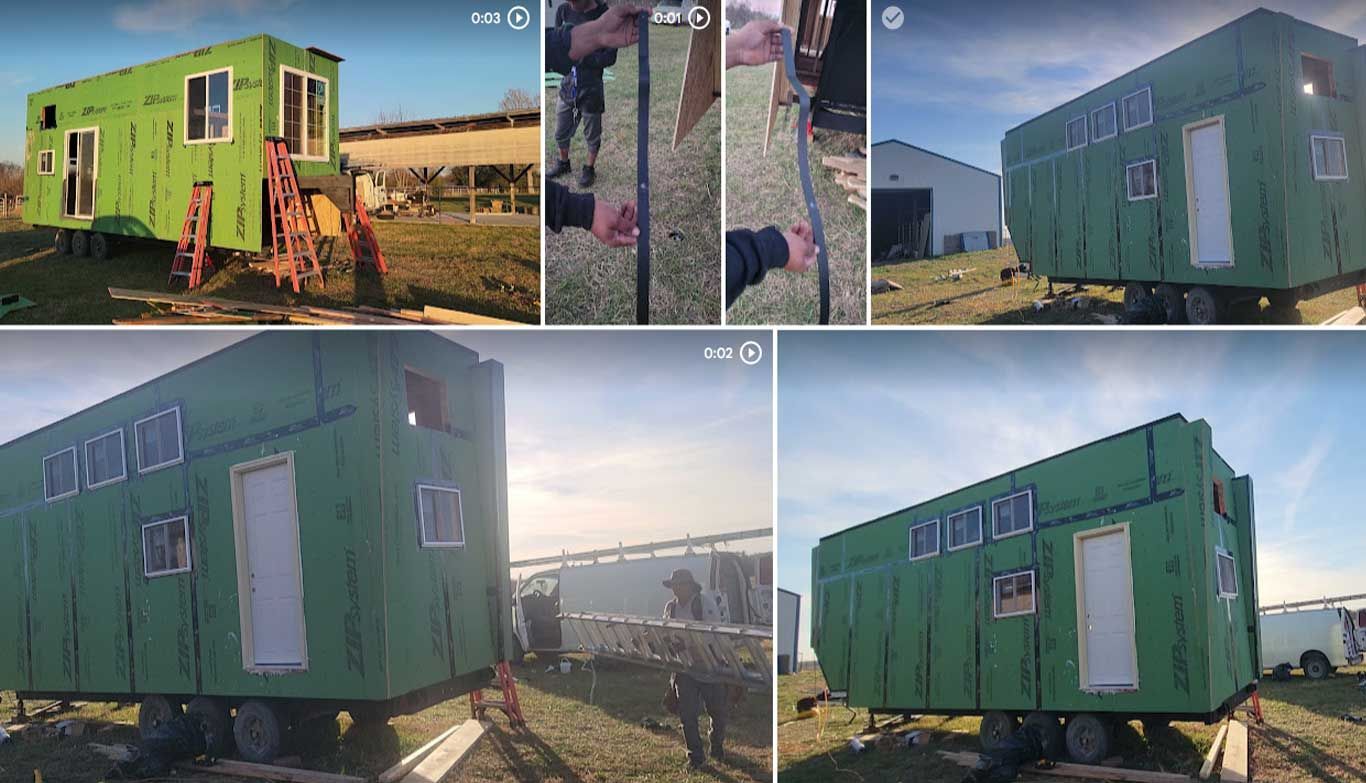
The first image presents a front and side view of our tiny house, now equipped with windows and a door. The windows bring in natural light, making the interior bright and inviting. The door, centrally placed, serves as a welcoming entryway. The green sheathing panels are still visible, but the house's form and function are becoming clear.
Sealing and Insulating
In the second image, a team member is shown carefully applying sealing tape around the windows. This step is crucial to ensure that the house is weatherproof and energy-efficient. The tape seals any gaps, preventing drafts and moisture from entering the home. It's a meticulous process, but it's essential for the long-term comfort and durability of the house.
Rear View and Final Adjustments
The third and fourth images show the rear view of the tiny house with additional windows and the back door. These windows provide ventilation and views, enhancing the living experience. The team makes final adjustments to the installations, ensuring that everything is secure and properly aligned. The ladders and tools scattered around hint at the ongoing work and attention to detail.
With the windows and doors in place, our tiny house feels more complete and livable. The once open frame now encloses a space filled with light and potential. These installations are not just practical; they symbolize the transition from a construction site to a home.
Stay tuned as we move forward with the interior work, adding the finishing touches that will make this tiny house truly special. From insulation to interior decor, there are exciting steps ahead on our journey to creating a perfect tiny home.
Roof Installation
On the ninth day, we tackle one of the final major exterior projects: installing the roof. This crucial step will ensure our tiny house is protected from the elements and ready for the next phases of construction.
Securing the Roof Panels
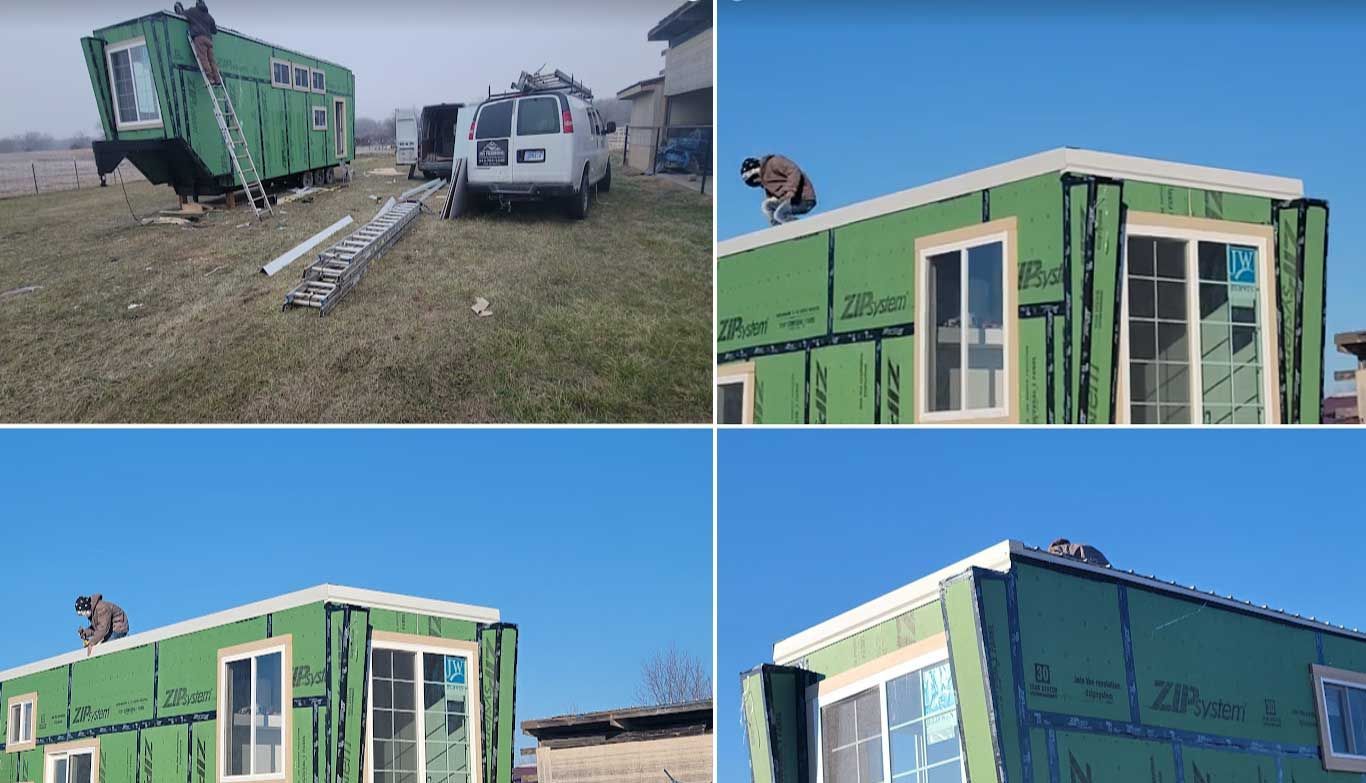
The first image shows a team member diligently working on the roof. The initial step involves securing the roof panels to create a solid, weatherproof barrier. This requires precise alignment and fastening to ensure that the panels fit snugly together, providing maximum protection against rain and wind.
Ensuring Stability
In the second image, the focus is on ensuring the stability and durability of the roof. The team takes great care to secure every section properly, checking that all seams and joints are tightly sealed. This meticulous work will prevent any potential leaks or weaknesses, ensuring the longevity of the tiny house.
Final Adjustments
The third image captures the final adjustments being made to the roof. With the panels in place, the team double-checks the entire structure, making sure that everything is perfectly aligned and secure. The smooth, finished surface is a testament to their hard work and attention to detail.
With the roof securely in place, our tiny house is now fully enclosed and protected from the elements. This milestone marks a significant step towards completion, allowing us to focus on the interior with confidence that the structure is sound.
Interior Drywall and Finishing Touches
As we reach the tenth day, significant progress has been made inside our tiny house. The installation of drywall marks the beginning of the final phase of construction, transforming the raw interior into a finished living space.
Installing Drywall
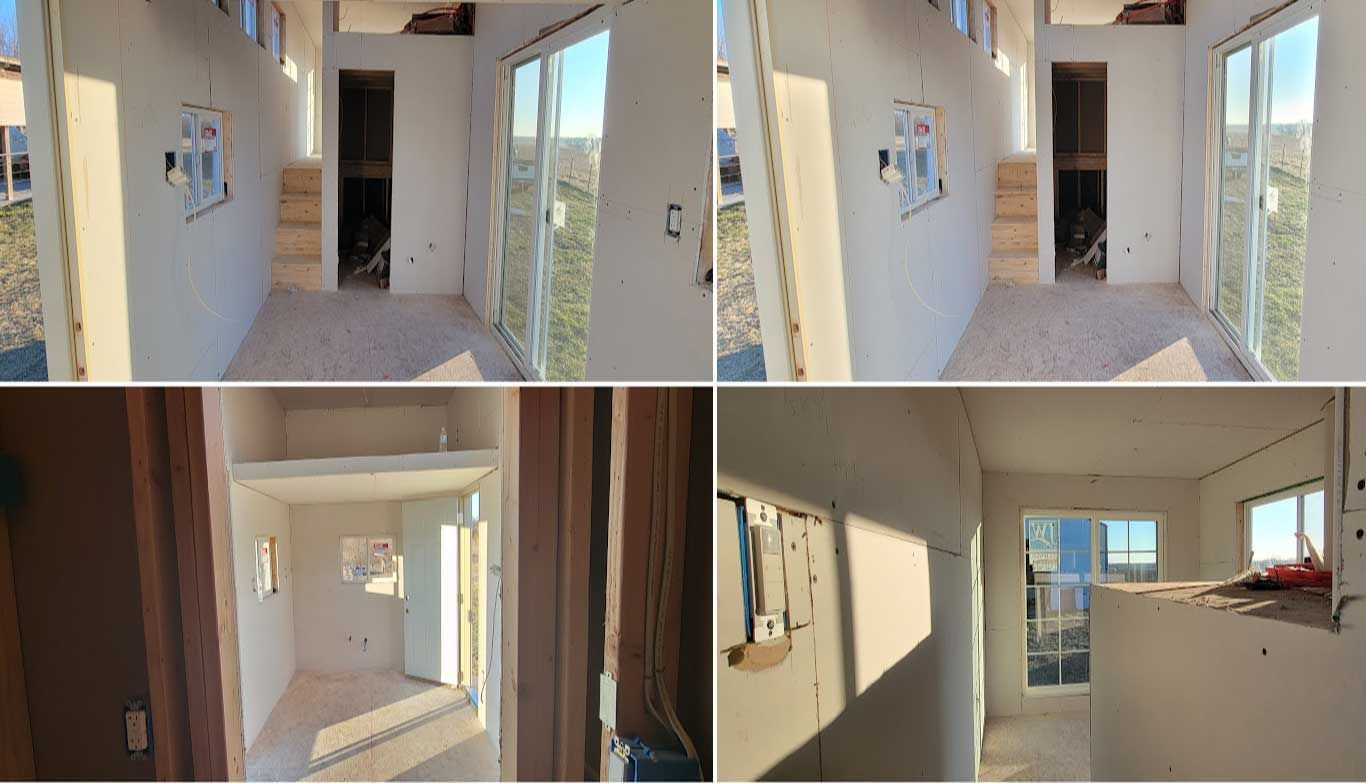
In the first image, the newly installed drywall covers the walls, giving the interior a clean and smooth appearance. This crucial step provides a base for painting and decorating, ensuring that the walls are both durable and aesthetically pleasing. The wiring for electrical outlets and switches is in place, ready for the next steps in the finishing process.
Staircase and Loft Access
The second image highlights the staircase leading up to the loft. These sturdy steps not only provide access to the upper level but also double as storage, utilizing every inch of space efficiently. The staircase design is both practical and stylish, fitting perfectly into the compact layout of the tiny house.
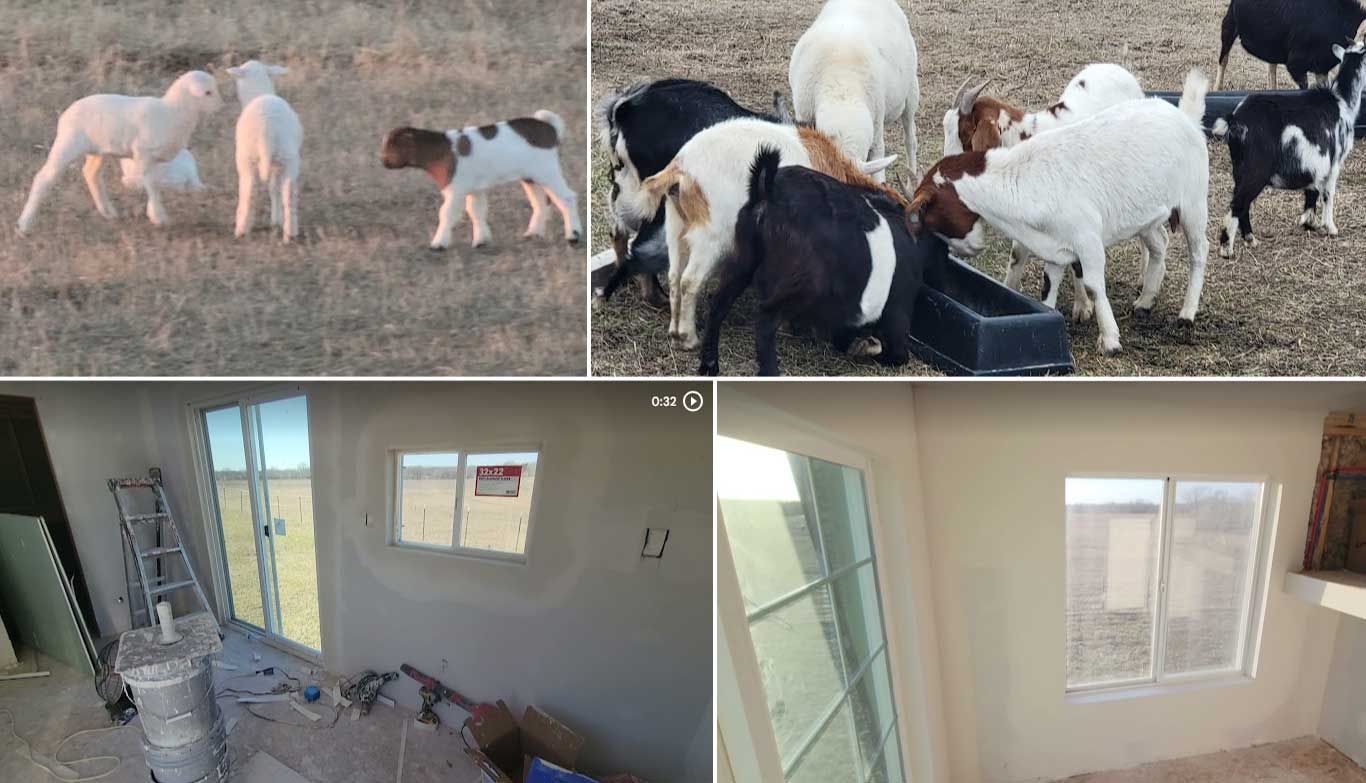
Natural Light and Open Spaces
The large windows and sliding glass doors flood the interior with natural light, creating a bright and airy atmosphere. These features enhance the sense of space, making the tiny house feel larger and more inviting. The clever placement of windows at different heights ensures that each area is well-lit throughout the day.
Ready for Finishing Touches
With the drywall up and the basic structure complete, the tiny house is ready for the finishing touches. This includes painting, installing fixtures, and adding personalized elements that will make the space truly feel like home. The open and clean interior provides a blank canvas for creativity and customization.
Interior Progress and Custom Features
On the eleventh day, we see substantial progress inside the tiny house. The interior space is starting to take shape, with custom features being added that will make this tiny house both functional and stylish.
Hallway and Entryway
In the image, the view from the entryway down the hallway highlights the open and airy design. The large sliding glass doors at the end bring in plenty of natural light, enhancing the sense of space. The clean lines of the drywall create a modern and streamlined look, providing a blank canvas for the upcoming decorative touches.
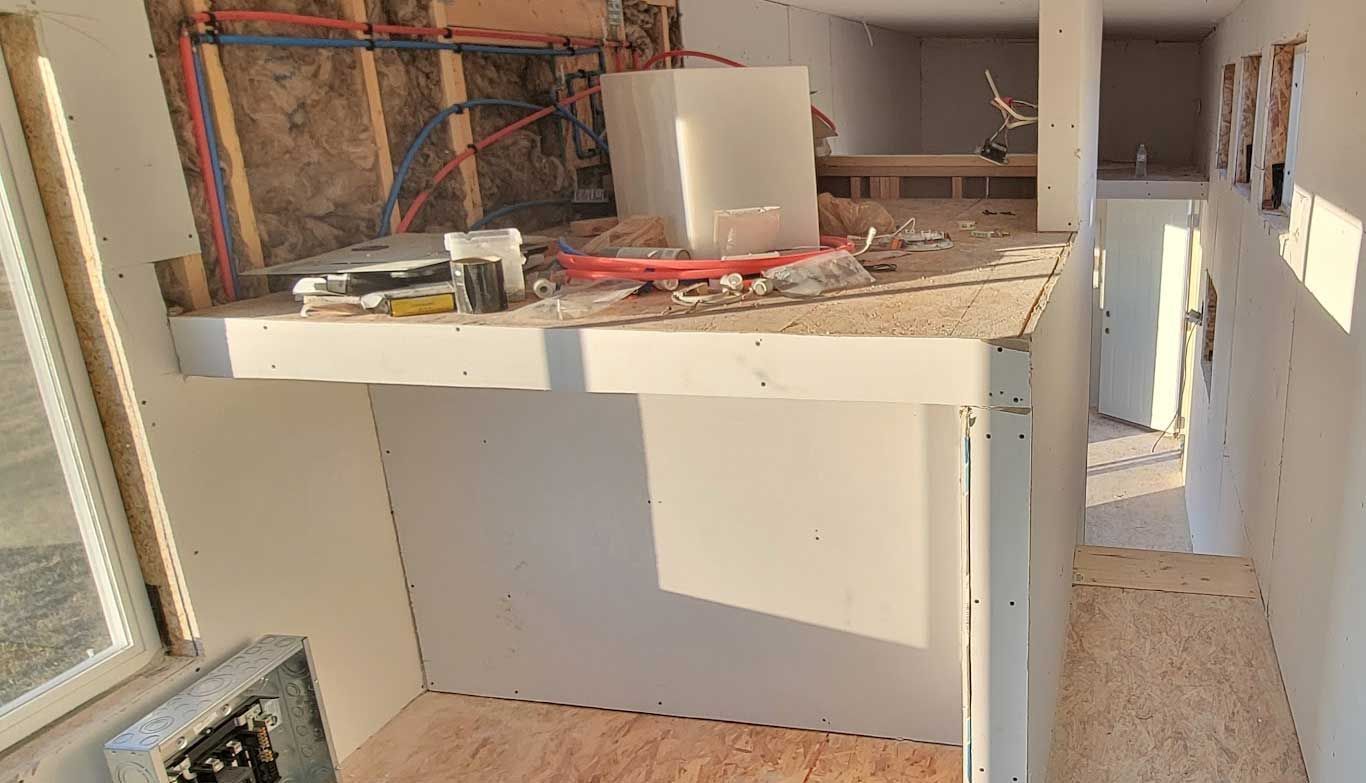
Loft and Utility Area
The image show the loft and utility area under construction. The loft provides a cozy sleeping space that maximizes the vertical height of the tiny house. Below the loft, the utility area is taking shape, with plumbing and electrical installations visible. This space will house essential systems like the water heater and electrical panel, efficiently tucked away to maintain a clean and organized look.
Custom Features
The images also highlight the beginnings of custom features designed to enhance functionality. The utility area, for example, is cleverly integrated into the structure to save space. The careful planning and execution of these features ensure that every inch of the tiny house is used effectively, providing maximum comfort and convenience.
With the drywall up and custom features in progress, the tiny house interior is beginning to feel more like a home. The next steps will involve finishing these areas, adding cabinetry, painting, and decorating to bring warmth and personality to the space.
Interior Painting and Color Schemes
On the twelfth day, the focus shifts to adding color and personality to the interior of our tiny house. The walls, which were previously bare drywall, are now being transformed with carefully chosen paint colors and textures.
Experimenting with Colors
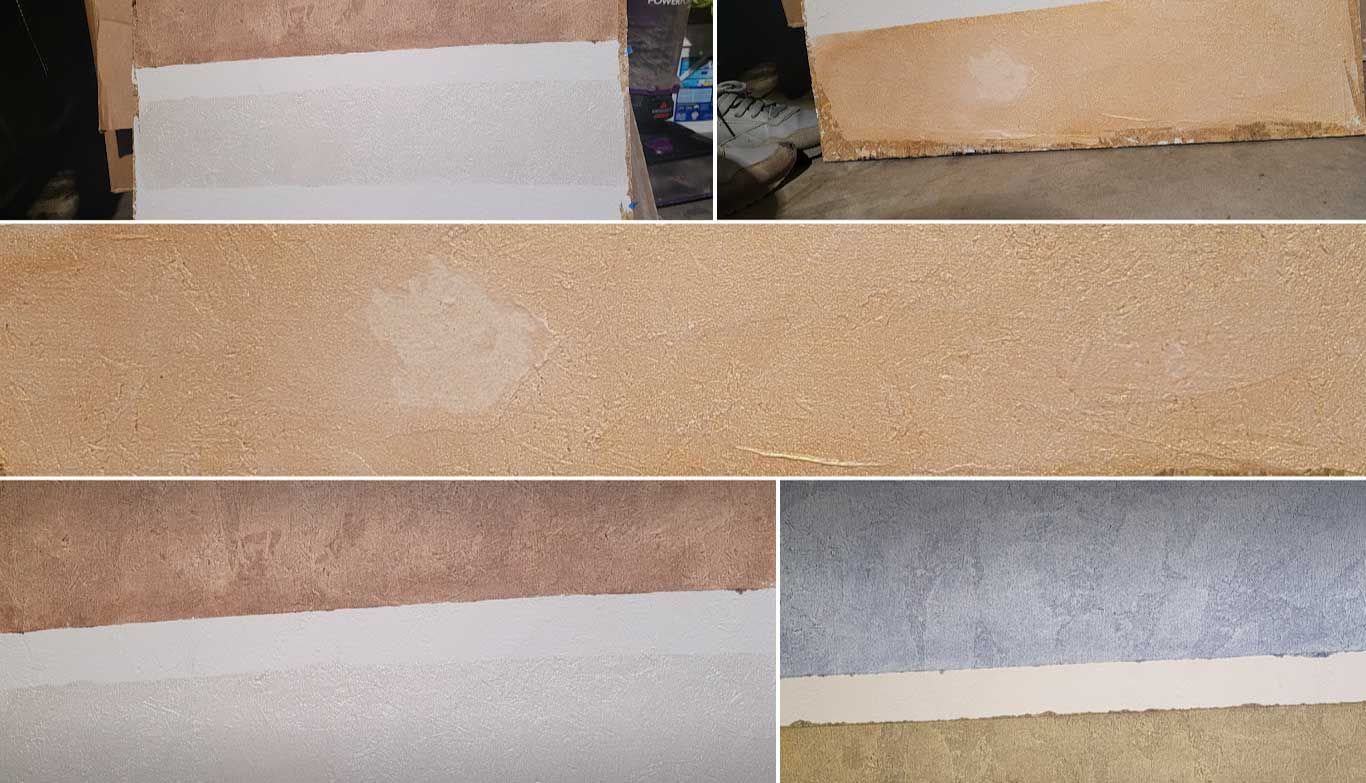
In the first image, we see a base coat of a warm, earthy beige applied to the lower part of the wall. This color choice brings a sense of warmth and coziness to the space, creating a welcoming atmosphere. The upper part of the wall remains white, providing a neutral contrast that enhances the beige tone.
Adding Depth with Texture
The second image showcases the same beige base with added texture. The textured finish gives the wall a unique, handcrafted look, adding depth and interest. This technique not only enhances the visual appeal but also provides a tactile element, making the space feel more dynamic and engaging.
Incorporating Different Hues
In the third image, we see the introduction of a deeper, richer brown. This color adds a touch of sophistication and elegance to the interior, complementing the beige base and creating a harmonious color palette. The combination of these tones makes the space feel more layered and nuanced.
Cool Tones for Balance
The fourth image presents a shift towards cooler tones with a soft blue-gray texture. This color brings a sense of calm and tranquility, balancing the warmth of the beige and brown hues. The blue-gray texture is perfect for areas where a serene and relaxing atmosphere is desired, such as the bedroom or living room.
Final Touches and Harmony
The final image showcases a blend of all the colors, demonstrating how they work together to create a cohesive and balanced interior. The use of different hues and textures adds character and personality to each space, ensuring that every corner of the tiny house feels thoughtfully designed and inviting.
As we continue with the finishing touches, the tiny house is becoming a true reflection of style and creativity. Stay tuned as we add more elements, from flooring to furnishings, bringing this dream home closer to completion. Each stroke of paint and every design choice contributes to the unique charm and comfort of our tiny house.
Final Preparations and Serene Surroundings
As we approach the final stages of our tiny house project on the thirteenth day, there's a blend of construction activity and the peaceful backdrop of nature that surrounds our build site.
Playful Lambs and Goats
In the first image, playful lambs frolic in the field, their presence adding a touch of joy and serenity to the construction site. These young animals embody the sense of new beginnings and fresh starts that our tiny house represents. Their playful energy mirrors the excitement we feel as we see our project nearing completion.
The second image features a group of goats gathered around a feeding trough. These hardworking animals remind us of the effort and dedication that has gone into building our tiny house. Just as the goats diligently feed, our team has poured their time and skills into creating a beautiful, functional home.
Faux Finish and Final Detailing
On the fourteenth day, we turn our attention to adding the final artistic touches to the interior walls of our tiny house. The use of faux finishes brings texture and depth, transforming the plain walls into stunning visual features.
Applying Faux Finish
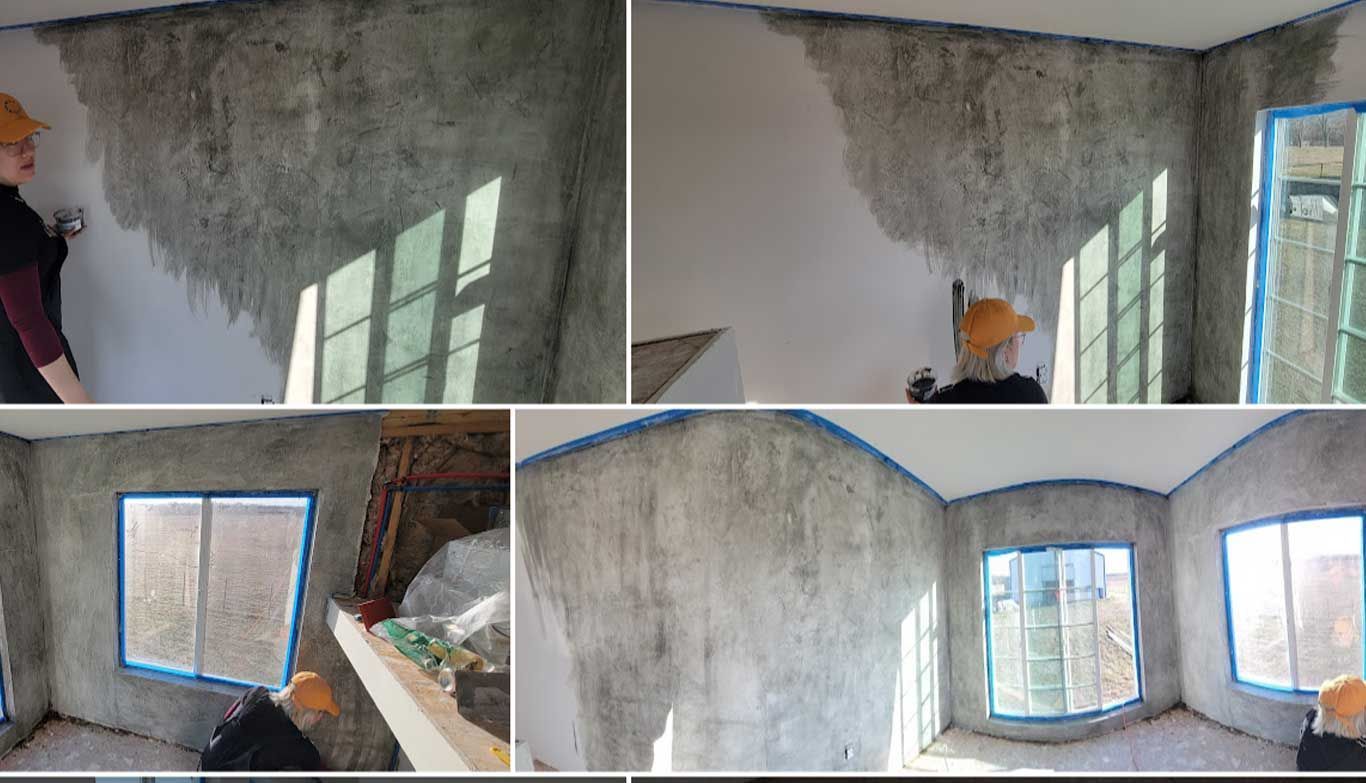
In the first image, we see an artist beginning the application of a faux finish. The technique involves layering and blending different shades to create a textured, stone-like appearance. This process adds a rustic, natural look to the walls, complementing the modern design elements of the house.
Progress and Detail
The second image captures the artist as they continue to work on the faux finish. The meticulous application requires patience and skill, ensuring that the texture is consistent and realistic. The large windows, now protected with painter’s tape, allow natural light to highlight the variations in the finish, enhancing the room's ambiance.
Completing the Look
In the third and fourth images, the faux finish is nearly complete. The walls now boast a rich, textured appearance that adds warmth and character to the space. The sunlight streaming through the windows plays off the textured surface, creating beautiful shadows and highlights that change throughout the day.
Transforming the Space
The final image shows the completed faux finish, transforming the interior into a cozy and inviting space. The textured walls provide a perfect backdrop for the upcoming furnishings and decorations, making the room feel both sophisticated and welcoming.
Final Color and Texture Reveal

we reveal the final color and texture combinations that bring our tiny house to life. These elements add the finishing touches, transforming the interior into a vibrant, cozy home.
Warm and Inviting Colors
The first image showcases the warm, inviting tones of the orange walls. The color exudes warmth and comfort, making the space feel welcoming and cheerful. The textured finish adds depth, creating an interesting visual effect that catches the light beautifully.
Seamless Integration of Spaces
The seamless integration of different spaces within the tiny house. The blend of warm orange and rustic gray textures defines each area, creating a cohesive look while maintaining distinct zones. The loft space, visible from the main living area, provides additional functionality and charm.
Attention to Detail
We see the careful attention to detail in the textured finishes. The variations in color and texture add character to the walls, making each section unique yet harmonious with the overall design. The rustic gray walls complement the warm orange, balancing the visual weight and enhancing the aesthetic appeal.
A Cozy Living Space
The images provide a broader view of the living space. The combination of large windows, warm colors, and textured finishes creates a cozy and inviting environment. The sunlight streaming in through the windows highlights the textures, adding a dynamic element to the room.
Harmonious and Functional Design
The images showcases the harmonious and functional design of the tiny house. The thoughtful use of color and texture not only enhances the visual appeal but also contributes to the practical layout. Each element is carefully chosen to reflect the personality and style of the occupants, ensuring that the tiny house feels like a true home.
Exterior Finishing Touches
As we enter the nineteenth day, the focus shifts to completing the exterior of our tiny house. The final touches of paint and sealing bring the exterior to life, ensuring it is both aesthetically pleasing and weatherproof.
Applying the Base Coat
In the first set of images, we see the application of the base coat to the exterior walls. This light blue-green hue serves as a primer, providing a smooth and uniform surface for the final paint layers. The base coat also helps to protect the structure from the elements, ensuring durability and longevity.
Attention to Detail
In the third set of images, we see the careful attention to detail as the painting progresses. The windows and doorframes are meticulously painted to match the overall design, ensuring a cohesive and polished appearance. The sharp lines and clean finish highlight the modern architectural design of the tiny house.
Final Preparations
With the exterior painting in progress, the next steps involve sealing and weatherproofing to ensure the tiny house is ready for all seasons. The attention to detail and careful selection of materials and colors have transformed the tiny house into a beautiful and functional living space.
Stay tuned as we make the final preparations for the grand reveal. The journey from a bare trailer to a fully finished tiny house has been incredible, and we are excited to share the finished product with you. Every detail, from the interior textures to the exterior texture, reflects the creativity, dedication, and hard work that has gone into this project.